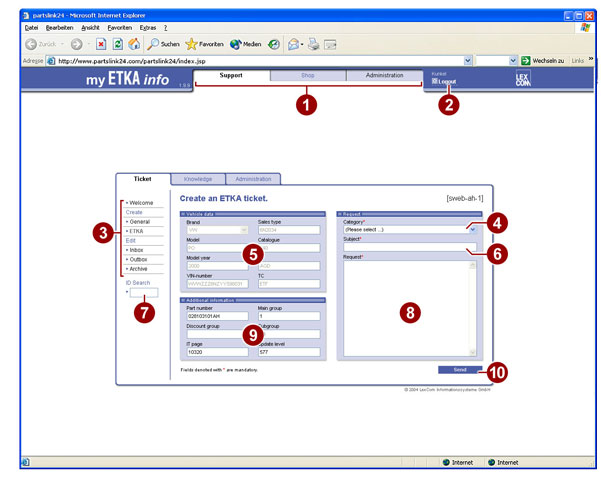
When you have opened the “my ETKA info” page, you can create a Ticket directly. All car data (if required, all FI data) has been transferred automatically to the ticket mask in accordance with the preceding search status.
1. Buttons for switching working levels.
2. Button for logging off. After
logging off, you can close Internet Explorer by clicking on the ![]() button.
button.
3. Ticket menu overview.
4. Mandatory input field with a pull-down menu for determining the request category.
5. Overview field with car data that depends on the relevant ETKA search status.
6. Mandatory input field for naming the request topic.
7. Input field for the ticket ID number for searching for a particular ticket.
8. Mandatory input field for entering the request (problem description).
9. Overview field with additional information that depends on the relevant ETKA search status.
10. SEND button. When you click on it, the view for selecting the recipient address opens.
The communication with the ETKA ticket depends on the relevant country-specific structures. As a dealer, you usually communicate with a distribution center. You enter the distribution center to which you want to send an ETKA ticket in a second step.
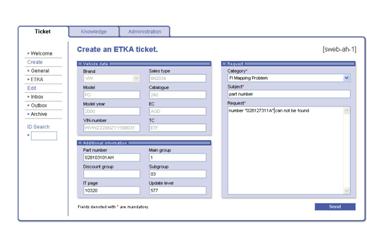
● Select an entry from the “category” pull-down menu.
● In the “Subject” input field, enter a meaningful reference to your subject.
● In the “Request” input field, enter a request text.
● Click on SEND. The view for entering the recipient address opens.
> You must make an entry in all the input fields with a red asterisk.
The second work step takes place in the “Address your ticket” view.
● Select a recipient from the “Send to” pull-down menu.
● Click on SEND. The ticket is sent to the selected distribution center.
Each newly created ticket is automatically assigned a ticket ID. If there are many tickets in your issue and receipt overviews, you can locate a ticket quickly using this ticket ID.
You can open your ticket issue and receipt overviews using the menus of the ticket menu overview. You can archive older, completed activities to ensure that the issue and receipt overviews do not become too complex. The following illustration shows an open ticket receipt account:
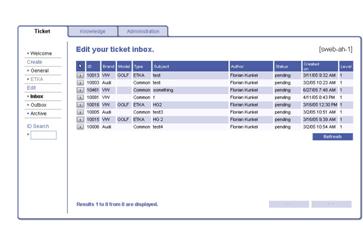
● Click on the ![]() button in front of the ticket data line if you
want to view the ticket.
button in front of the ticket data line if you
want to view the ticket.
In the following view, all the communication contents are displayed in the “Ticket history” field.
● Click on ACCEPT if e.g. your request has been answered satisfactorily.
● Click on RETURN if you require further information. A new window opens in which you can specify e.g. your request.
> The new information is always found in the ticket history field at the top. The tickets are labelled with their date and time.
> For instructions about the correct procedure for ticket management, see the information texts of the relevant views.
> If a ticket is answered and sent back to the creator (dealer), the latter is sent an information e-mail simultaneously.
> When you receive a ticket, a window opens in which you can evaluate the quality of the received ticket. If you want to archive the received ticket immediately, click on ARCHIVE in this window. It is not possible to delete the tickets.
● Enter the required ID number in the input field.
● Choose ENTER. The ticket is displayed in a new window.
● Click
on OK
if you want to edit this ticket. The ticket is displayed on the ticket overview
page and can be opened by clicking on the ![]() button.
button.